Hubspot reports that "marketers who prioritize blogging are 13x more likely to achieve a positive ROI on their efforts."
Those are great odds and definitely worth pursuing.
If you haven't started a blog for your organization, now is a good time to do so. To get you started, here is a step-by-step guide to developing and posting a blog through Hubspot.
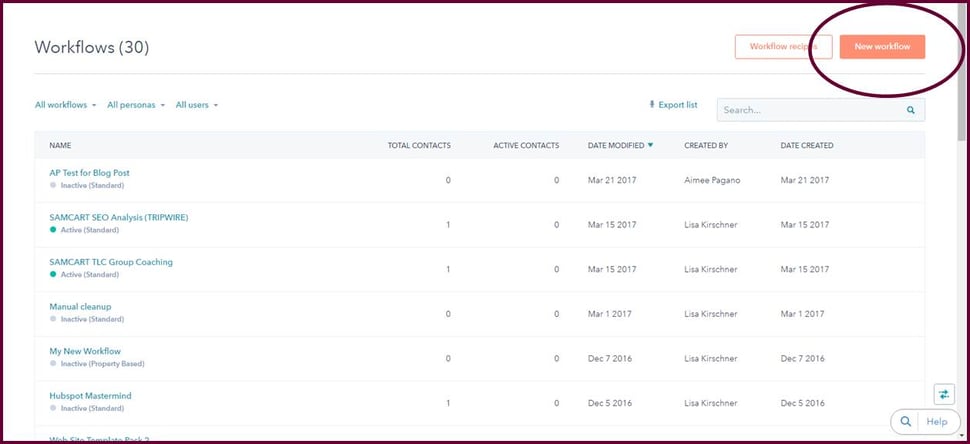
#1—Navigate to the Workflow area of Hubspot
Once you've logged into Hubspot on the main Hubspot page, go to the top navigational menu and choose Contacts > Workflows.
Once you’re in the Workflows dashboard, click on the New Workflow button.
On the Workflow page, you'll be presented with three options. The Standard option is the most common which is triggered by a specific action versus a date or time (i.e. enrollment, joining a list or filling out a form).

In the Workflow area, this is where you'll dictate how the workflow is going to be triggered. Under the Enrollment Criteria section, select the action that's going to trigger your workflow. The example below shows that I picked "List Membership". Specifically, I enrolled 'AP Test List'. This means anyone enrolled into the 'AP Test List' SmartList will be enrolled into the workflow. A SmartList could be anything depending on how create it. It could be anyone who downloaded a CTA off of your home page, for instance.
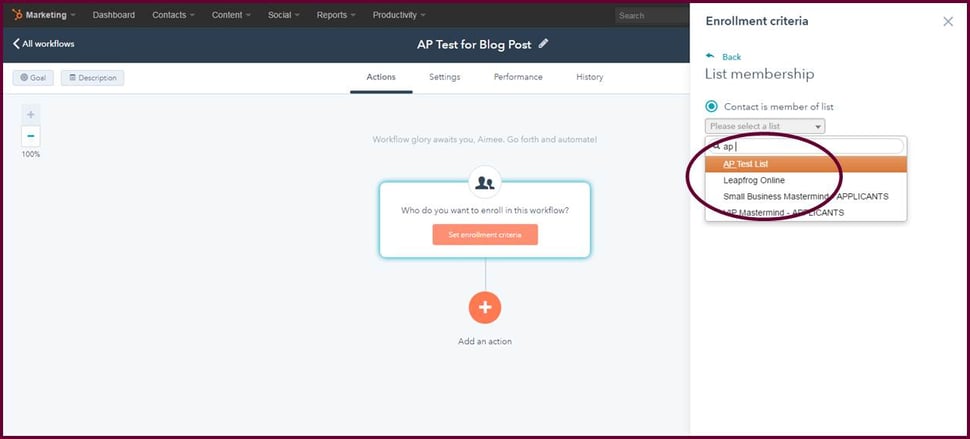
The Enrollment Criteria area offers multiple enrollment triggering options. In this case, I've selected two enrollment criterias. The first criteria is anyone enrolled in the AP Test List. The second criteria is anyone who filled out a form submission. In this instance, I've used the AP Test Form. So, my enrollment criteria is anyone who is enrolled in the AP Test List AND anyone who filled out the AP Test Form.

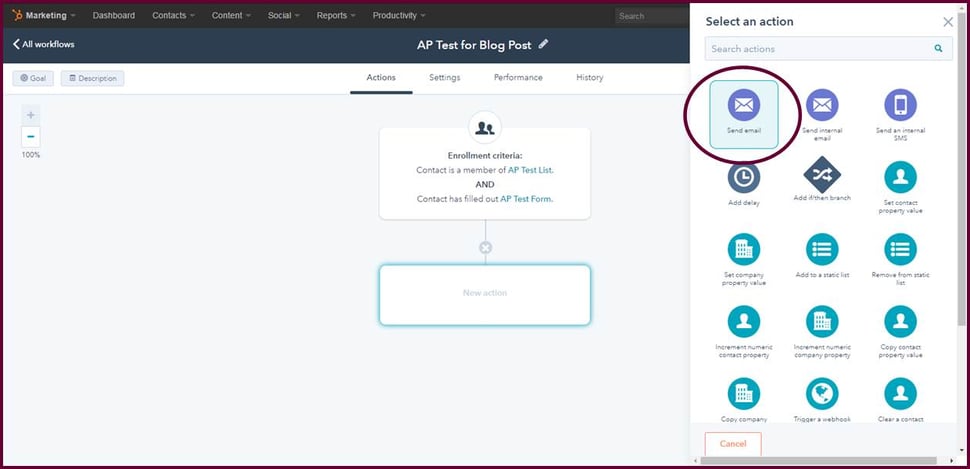
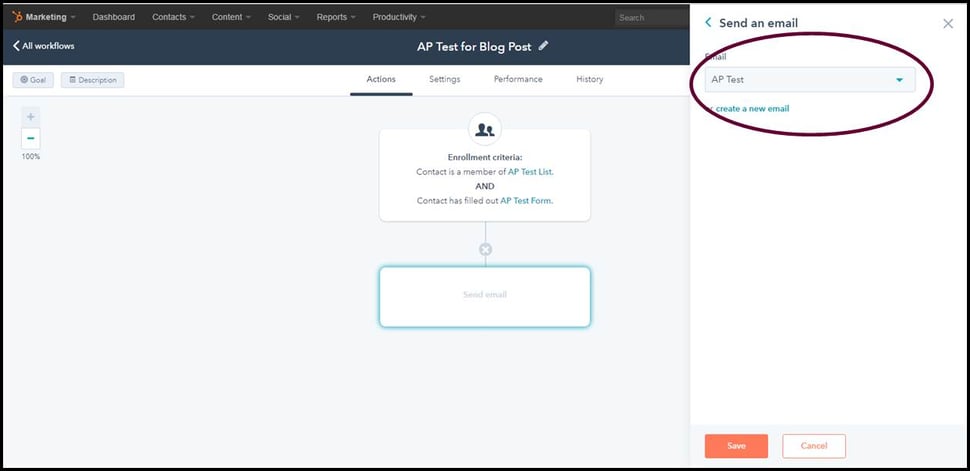
#2—Add an Action
Once you've set your enrollment criteria, you'll want to indicate the 'Action' that's going to be taken once this enrollment criteria is met.
In this instance, I've chosen "Send Email."
Once you reach the Settings page, follow the instructions below to effectively optimize your blog post.
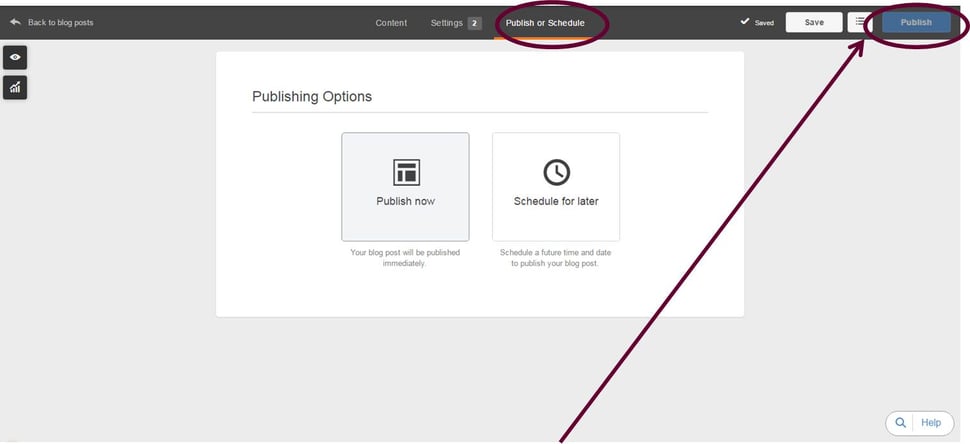
Publish your blog
Blogging wouldn't be blogging without it going live. Once you've properly reviewed, edited, and optimized your post for SEO, click on the Publish or Schedule tab. Once on the Publish or Schedule page, you'll get the option to either post your blog immediately or schedule for a later date and time.
Want help developing and implementing your blog strategy for the year? Contact us today or sign up for our pay-as-you-go marketing support hours and we can start creating your content tomorrow!