If you're wondering how to post a blog in HubSpot...I have two things to tell you:
- You're not alone
- It's easier than you think
Let's take a look at just how easy it actually is...so read on, and you’ll be Content-is-Kinging it all the way to the coveted page one in no time.
For digital marketers, HubSpot is a phenomenal tool. For content marketers? It’s a dream. It's robust, versatile, scalable and powerful, with analytics that will basically blow your mind. And, did I mention…it can totally change how your content gets out there and who ends up reading it?
So all that said, we know…HubSpot is also a ridiculous beast. It can feel overwhelming and discouraging. Hours of videos to watch, lengthy tasks to master…learning the platform (both in terms of capability as well as functionality) may seem, well....difficult, to say the least.
I was there once too, fighting the very tool I’ve come to accept, love and feel pretty much unable to live without. So if you’re in the “I-can’t camp,” this is for you...
How to post a blog in HubSpot
NOTE: these directions and screen grabs are for the old dashboard. Be on the look out for a new blog with updated dashboard images once all HubSpot users have migrated over to the new interface...
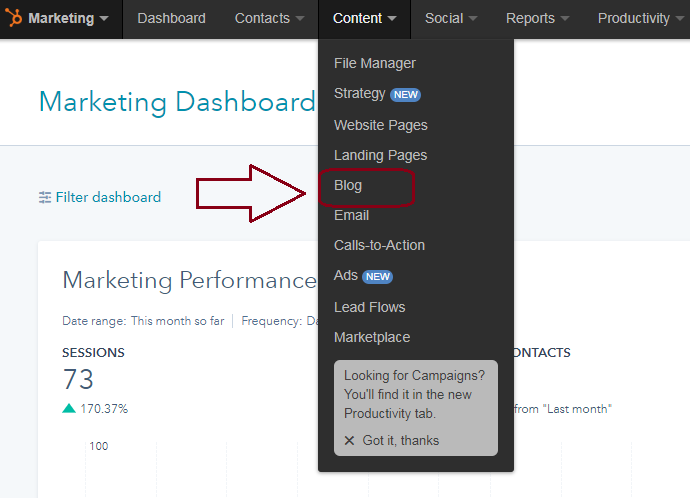
STEP 1: Open a blog
Once you’ve logged in to your HubSpot account, click the “Content” tab in the main navigation. Scroll down and click “Blog.”
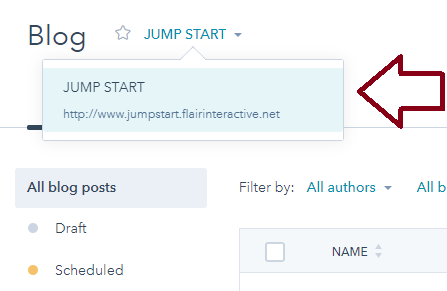
(Note, if you manage multiple blogs from your HubSpot account, be sure to toggle to the one you want to post from).
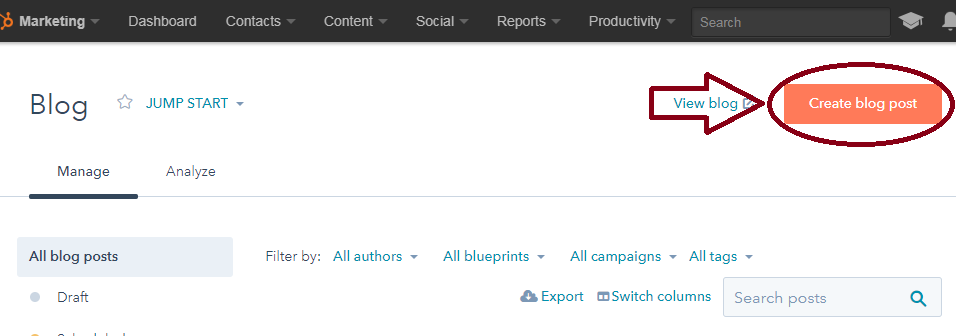
STEP 2: Create your post
Click “Create blog post.”
You can then choose which style you prefer to create in. I like the “Inline Edit Mode” and use it most, so this guide is for that mode.
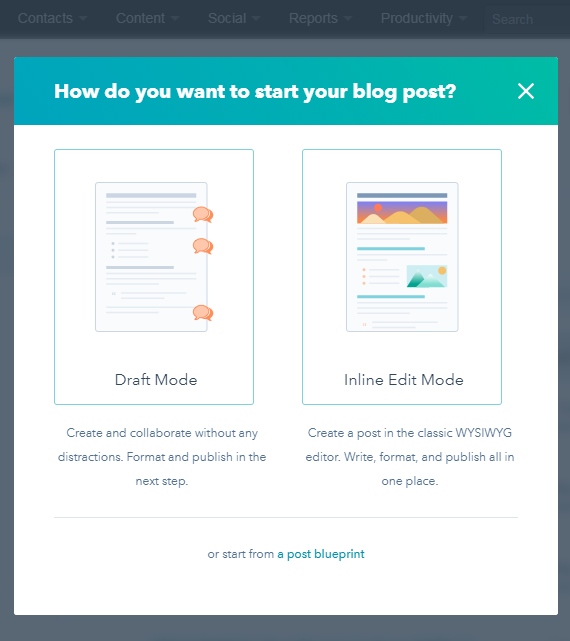
What’s the difference?
DRAFT MODE – clean work space with no distractions (also with no publishing functionality or features until after you’re done writing)
INLINE EDIT MODE – you’ll create with the What you see is what you get (WYSIWYG) editor, similar to other platforms (like WordPress)
Want to create from a template?
HubSpot makes this easy-as-pie with three blueprints you can start from. Blueprints are basically templated, pre-formatted posts that will give you a starting point while still allowing you edit and modify as needed. The current blueprint options are:
- How-to
- List
- Visual
Play around with these to see when and if you should use them.
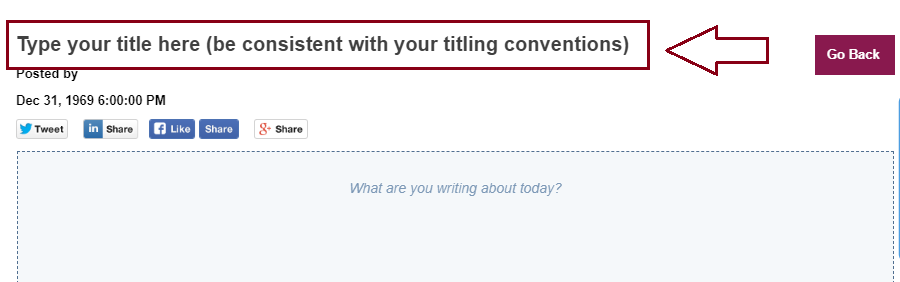
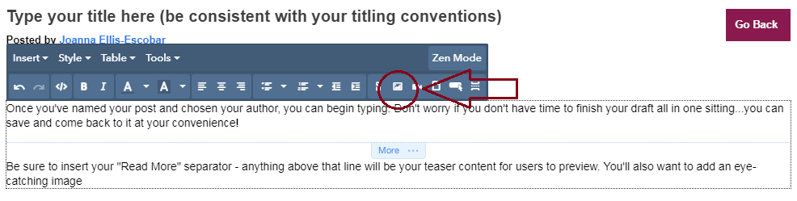
STEP 3: Name your post
Once you’re in your blog, you want to name it. Simply hover over the space where your title will go. In this mode, any time you can edit a part of the blog, a pencil will show up. Click and begin typing.
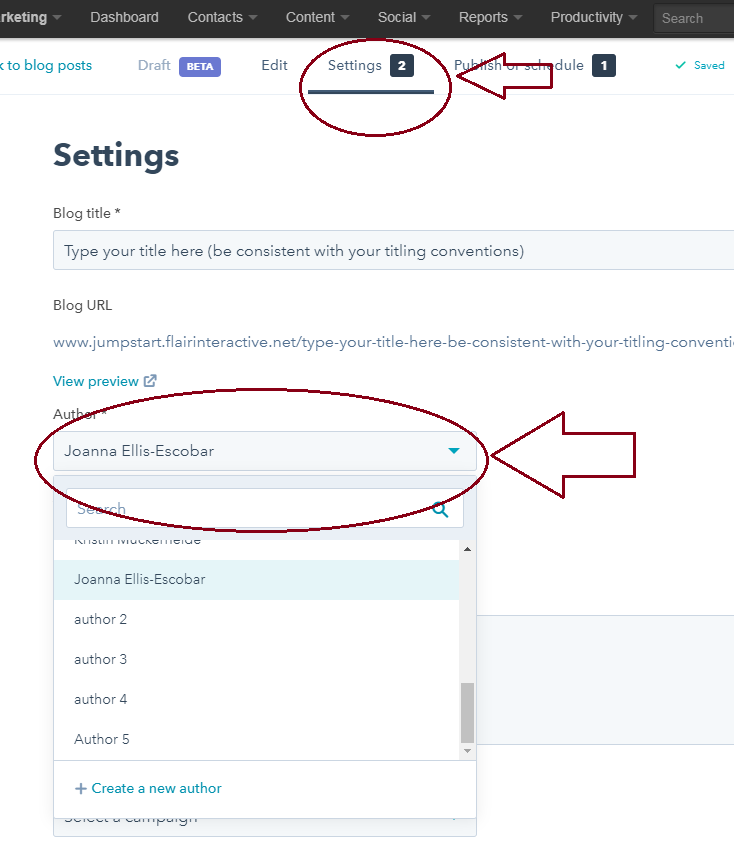
STEP 4: Choose your author
Hop over to the “Settings” tab and choose your author. This can be done with the dropdown tab that features all the authors who’ve been set up to blog. Don’t see your name? Creating an author is easy with the blue “+Create a new author” feature that shows up at the bottom of your list.
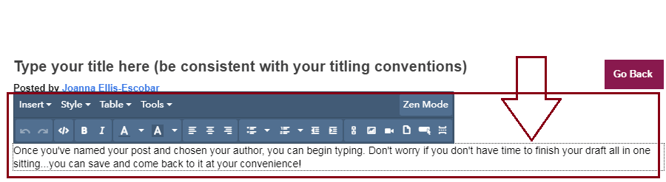
STEP 5: Begin drafting compelling, intriguing, engaging content
Once you've named your post and have chosen your author, you can begin typing. Don't worry if you don't have time to finish your draft all in one sitting...HubSpot autosaves as you go, so you can come back to finish at your convenience.
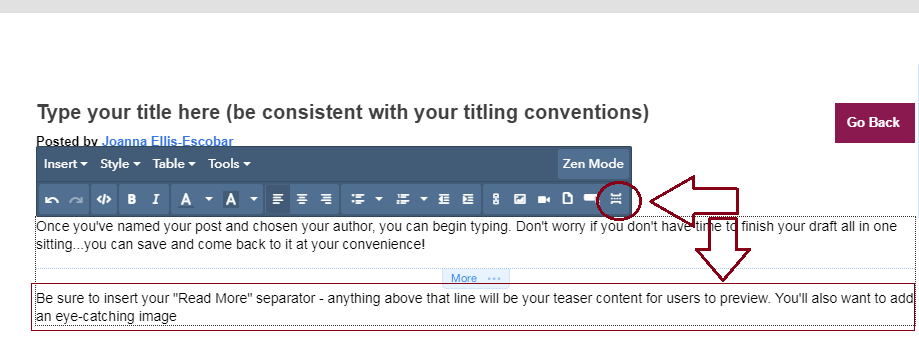
STEP 6: Insert your Read More Separator
The “Read More” separator creates a defined snippet of info for your readers to preview. If you don’t insert this, HubSpot’s default setting will automatically display the first paragraph of your copy.
STEP 7: Insert an image
You want some sort of graphic or image on every. single. post. Every post. Really, every one.
Click the image icon to insert an image from your library. If you haven’t yet uploaded the image you’ll use, it’s easy to do with the “Add image” button at the bottom of your library. 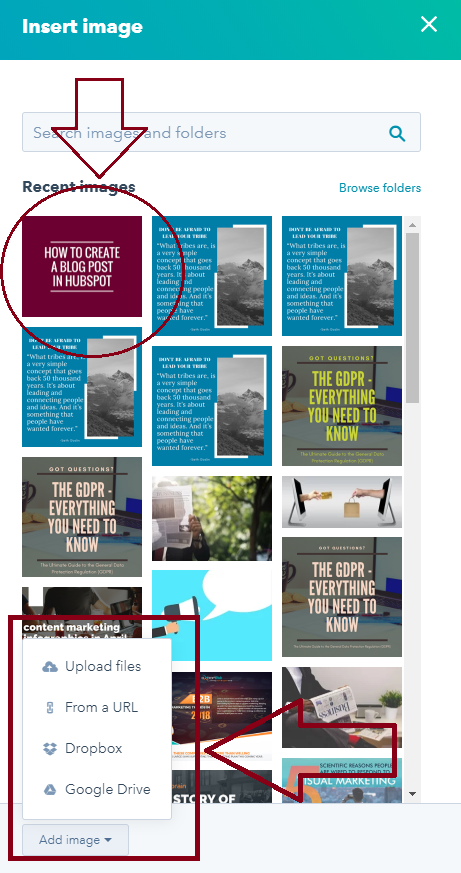
You may have to play around with alignment and placement.
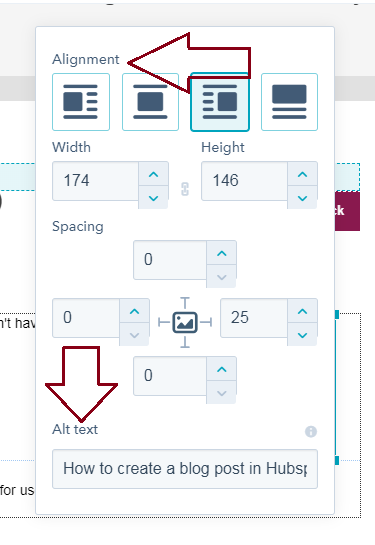
Remember to insert your image above the “Read more” separator so it will show up in the preview mode of your blog. And be sure that your Alt text is populated with descriptive, useful copy (Alt text is what optimizes your images).
STEP 8: Add your CTA
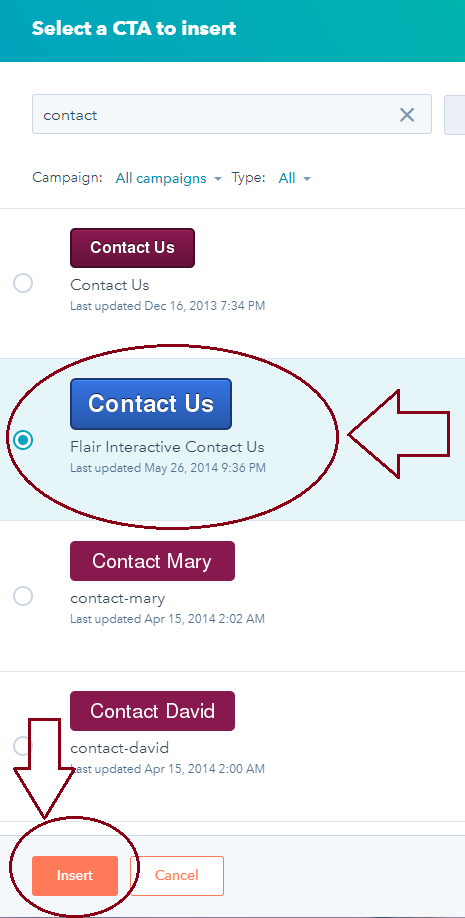
After you've written your blog, you want to have both a written call to action (CTA) (preferably one that links to a "contact us" page or other relevant page on your site) as well as a visual button. Insert a CTA button with the tool bar.
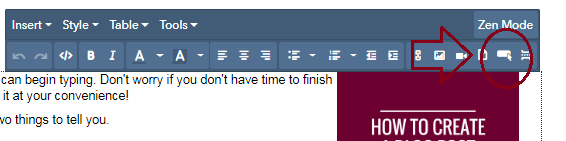
Choose the CTA you want to use and click Insert.
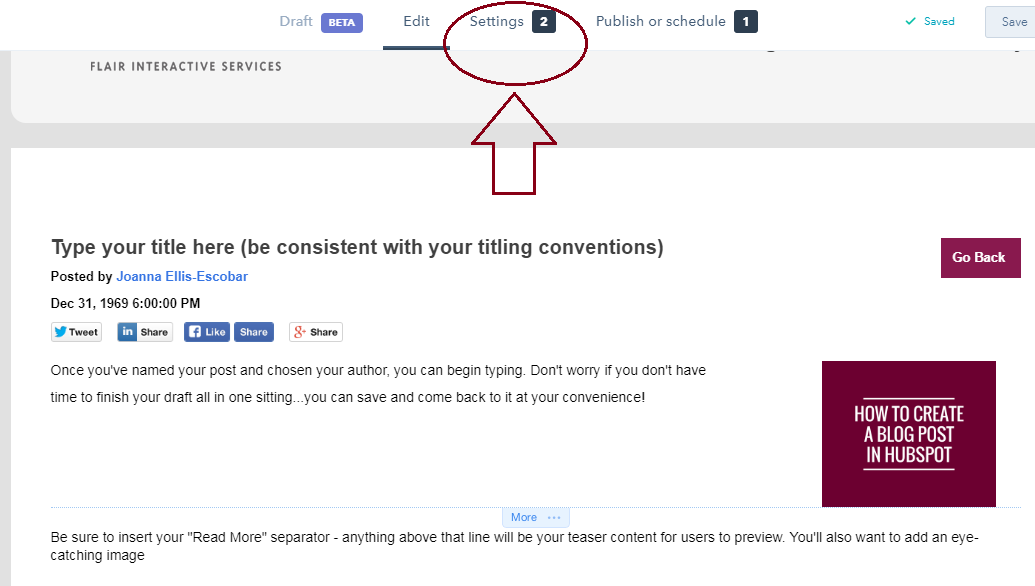
STEP 9: Check and configure your settings
After you’re done composing your blog, you want to hop back over to the "Settings" tab.
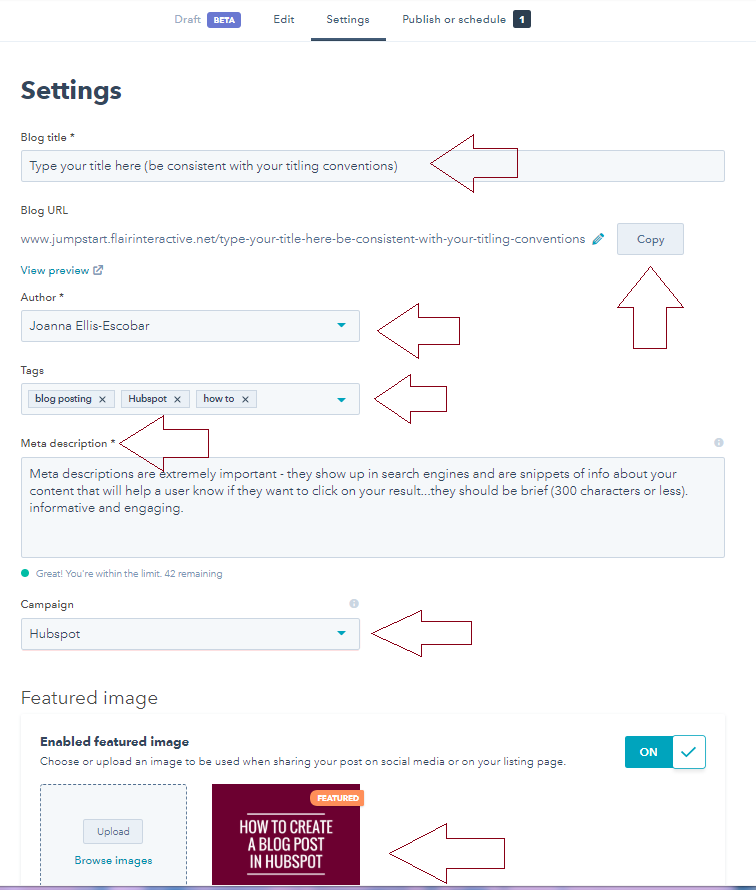
Here, you’ll be able to do things like:
- check that your title and url match
- tag your post
- add your meta
- choose a campaign
- set your feature image for social sharing
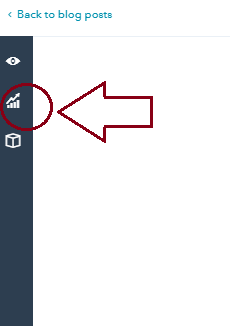
STEP 10: Optimize your post and preview it before publishing
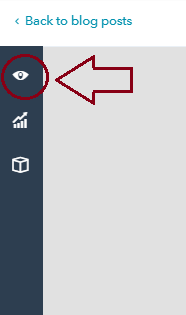
You’re on the home stretch! At this point, you want to optimize (for SEO purposes), and preview your post before hitting publish. To do this, click the SEO optimization button on the left side of the screen.
You’ll need to insert a keyword before the tool will analyze your post.
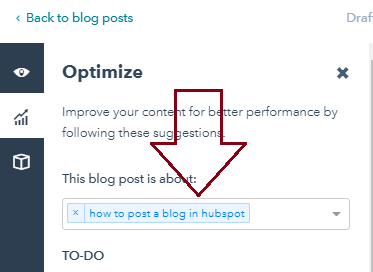
Once your keyword is in there, you’ll be able to check that you have done everything you need to do in order to post a successful, far-reaching blog that will attract your audience. You’ll probably have some items on the TO-DO list needing attention. That’s ok – just go back into your blog and make sure you address everything on the list.
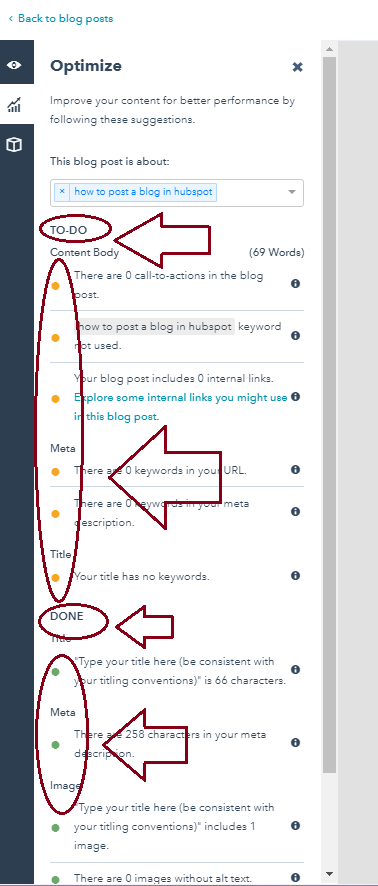
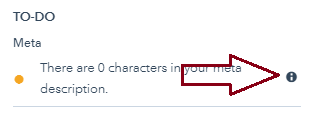
If you’re unsure of what to do or why you should do it, hover over the grey info icon for details.
After fixing everything listed in the TO-DO section, check again and you should see a bunch of green-means-go items listed in your DONE section.

Congrats! You’re ready to publish!!
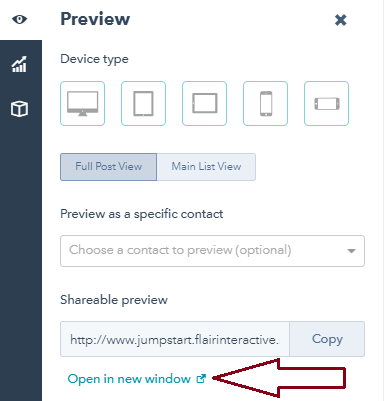
STEP 11: Preview your post
You may be ready to publish, but you should always preview your post before sending it out.
You can choose what device you want to preview on, and if you’d like to see the full post or the snippet view (how it will look on the front page of your blog with the “Read more” links). I suggest always clicking the blue “Open in new window” link, as I’ve found it to be more accurate in my preview view.
STEP 12: POST!
Click the “Publish or schedule” tab at the top of the page.
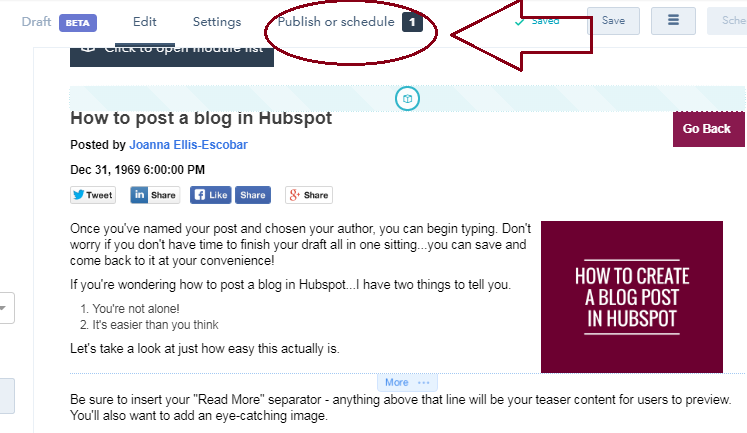
You can post right away, or schedule for posting at a later time. 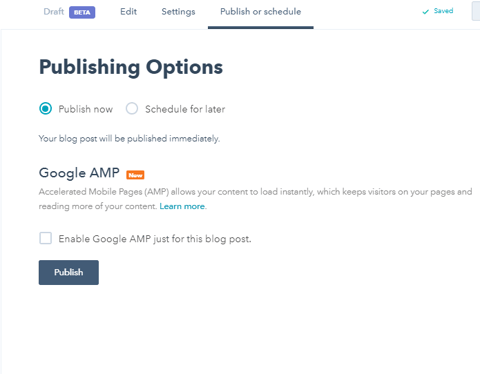
Well done! You have now created a blog post in HubSpot! Go you!
No time to manage your HubSpot account? Want to learn more about how HubSpot can help you attract > convert > close > and delight your customers? Great! Flair Interactive is a certified Chicago HubSpot agency that specializes in all-things-HubSpot. From content strategy to website design and redesign, to social media management, we're here and ready to help. Reach out today to see how the Flair team can help you.